How do I set WDS on my DAP-3315 ?
The DAP-3315 features seven different operating modes, allowing it to adapt to any situation.

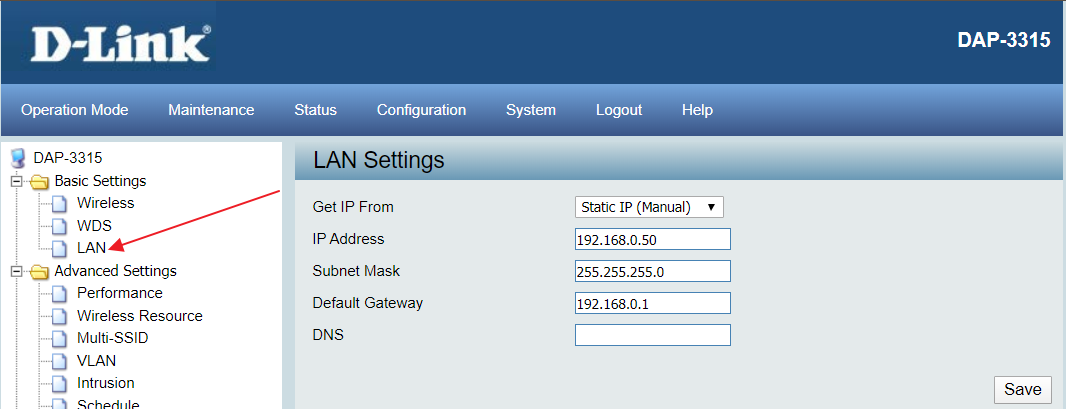
Connect to the first AP and change it's IP address to integrate the AP in your network.
Go to Basic Settings / Lan
Fill in the IP address fields according to your local needs and click on Save.
In order to set the DAP-3315 in WDS mode, click on the Operation Mode menu.
Select the operating mode WDS by clicking on the radio button, that correspondes to the mode then click on Save.
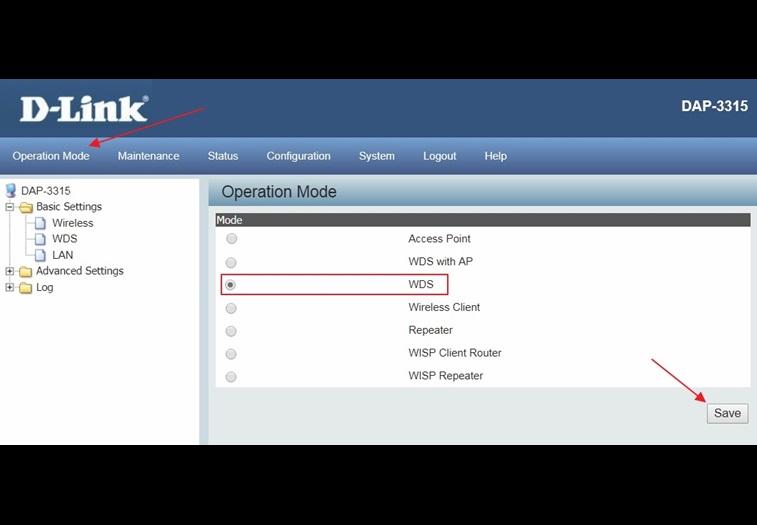
After confirming that the operating mode will be changed, the AP will reboot and will be ready for use after 40 seconds..
Connect to the second AP and follow the same steps.
At this point, you can install both APs in their final locations.
Remember that both APs have to see each other without any obstacles.
Connect back to the first AP and go to the WDS settings menu (Basic Settings / WDS) and click on Scan.
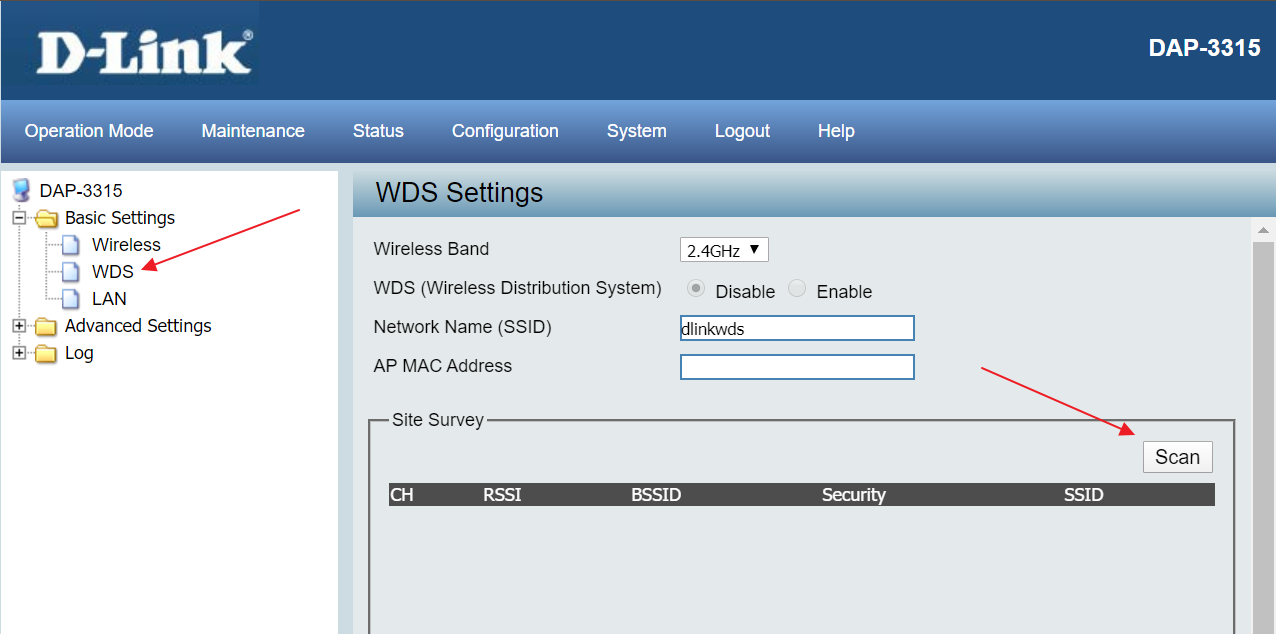
The second AP should appear in the Site survey area. Select it by ticking the radio button.
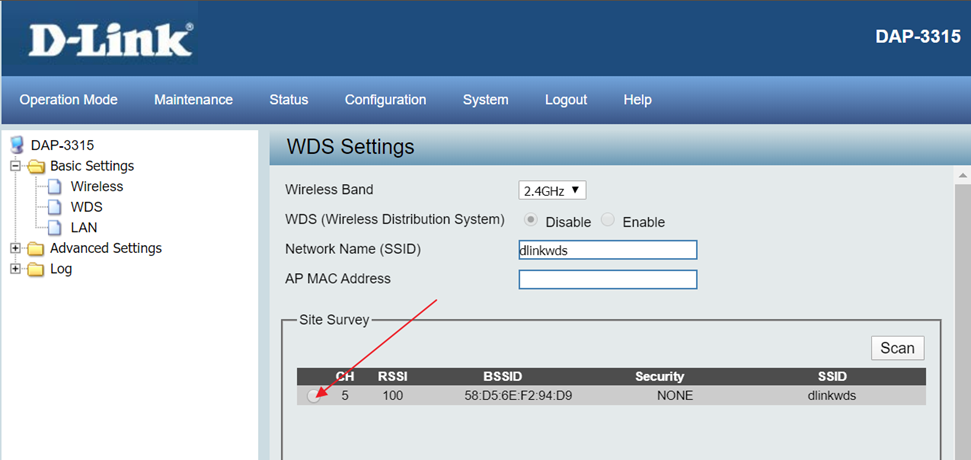
The Mac address of the remote AP shows in the AP MAC Address field and click on Save.
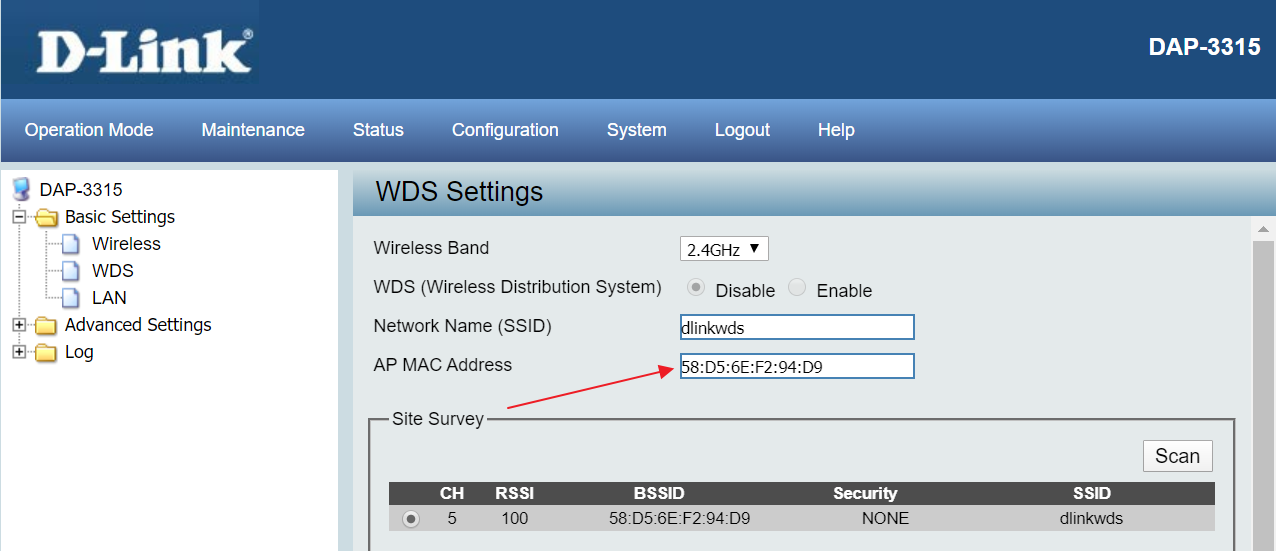
Go to the menu Configuration and click on Save and Activate.

After a few second, you can reach the second AP on the other side of the bridge.

As you can see, the WDS bridge is set with a default SSID (dlinkwds) but it doesn't have any encryption.
This means that your installation is working but at risk.
We strongly suggest you to change the SSID of your WDS bridge or, at least, to add encryption to this bridge.
In order to do so, please go to the remote AP setup page and in the WDS settings menu (Basic Settings / WDS) and go down to the encryption section.
In Authentication, please set WPA-Personal, select WPA2 and in Passphrase, enter a code that only you can remember then clic on Save.
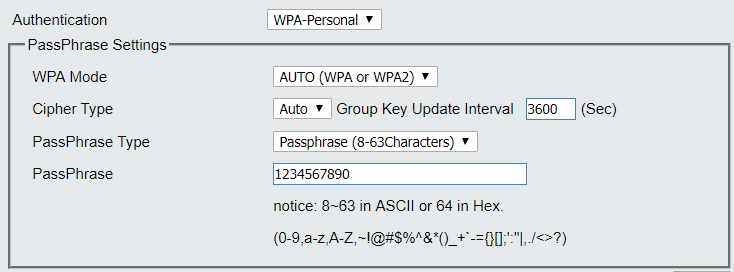
Go to the menu Configuration and click on Save and Activate.

As the remote AP is restarting, do the same changes on the AP primary AP.
Once done, both APs will initiate the bridge and you will be able to reach the other side of the WDS bridge.